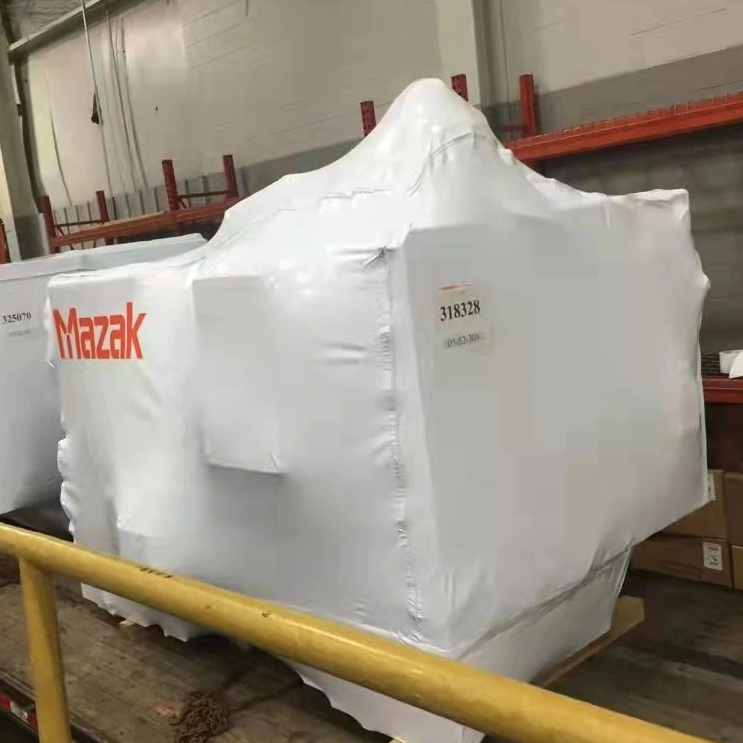
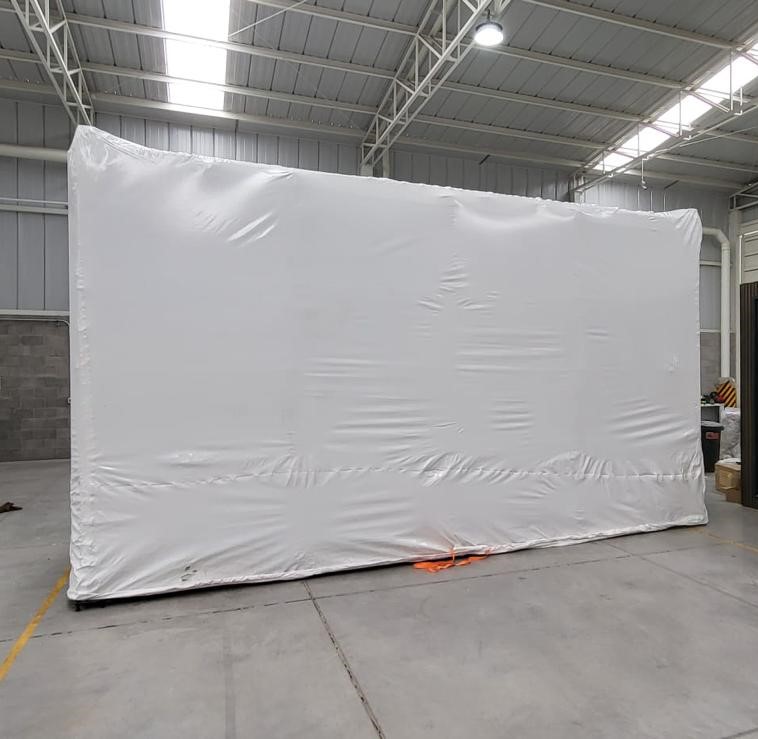
Large machinery, boats, modular units, and irregular cargo rarely fail at the easy parts of wrapping. Problems usually begin at sharp corners, loose seams, weak anchors, or areas heated too aggressively. A fitted heat shrink wrap cover can protect oversized items from moisture, dust, wind, UV exposure, and transport damage when the material and installation method match the job.
To shrink wrap large objects successfully, crews need more than film and a heat gun. The process depends on accurate measurements, padded contact points, a secure perimeter, controlled heating, and a final inspection before storage or shipment.
Choose the Cover Before Planning the Installation
Start with the Exposure and Handling Risks
Define what the cover must withstand before choosing the film. Indoor storage may require mainly dust and handling protection, while outdoor exposure adds sunlight, rain, wind, and condensation. Road or sea transport introduces abrasion, road spray, repeated lifting, cargo movement, and possible salt air. Shape, surface finish, storage duration, and transport route should guide material selection before size alone.
Industrial equipment & machinery covers may need additional protection around painted panels, flanges, control boxes, service ports, exposed shafts, and projecting components. These areas often create concentrated pressure as the film tightens. Padding, reinforcement, or intentional clearance may therefore matter as much as the film thickness itself.
Decide Between Roll Film and a Pre-Made Cover
Roll film provides flexibility for one-off jobs, changing cargo dimensions, partial coverage, and unusual attachment arrangements. Installers can cut, overlap, pleat, and weld it on site. The tradeoff is additional measuring, trimming, seam work, and greater dependence on operator experience.
Custom-fit shrink covers are better suited to repeated equipment models or shapes that make field cutting inefficient. A pre-cut or pre-formed cover arrives according to supplied dimensions, allowing the crew to move more quickly from draping to fastening and shrinking. Better dimensional consistency can also reduce loose folds, unnecessary overlap, and material waste.
Modular shipping & storage covers are designed for prefabricated rooms, wall panels, roof sections, windows, doors, and large construction modules. These components may face highway airflow, outdoor staging, and job-site contamination before installation. A properly sized enclosure reduces loose edges and gaps while improving coverage around the module’s profile.
Suggested Visual: Cover Selection Table
Use the load’s actual exposure and handling conditions to narrow the options. The table below provides a practical starting point rather than a universal specification. Final film thickness, reinforcement, and protective features should still match the project.
Project condition
Practical cover direction
One-time indoor storage
Standard roll film for dust and handling protection
Irregular heavy machinery
Reinforced film with padded contact points
Repeated equipment model
Pre-sized custom-fit shrink cover
Outdoor modular unit
Fitted or reinforced cover with UV and moisture protection
Corrosion-sensitive metal shipment
Suitable enclosure with a project-specific VCI option
Measure and Prepare the Object Before Opening the Film
Inspect Every Surface the Film Will Touch
Walk around the entire object before unrolling the film. Mark sharp corners, bolts, brackets, flanges, handles, and other points that could puncture the material as it contracts. Identify painted surfaces, cables, hoses, sensors, vents, control panels, and electrical enclosures that may need padding or clearance. Lifting points and inspection areas should also be mapped when later access is required.
Pad vulnerable contact points and secure anything that could move beneath the cover. Abrasion-resistant padding can be placed over corners, edges, and protrusions that would otherwise concentrate pressure against the shrinking film. Loose cables, hoses, or removable components should be tied down or protected so they do not shift during handling.
Flat tops or deep recesses may need temporary framing or tensioned support to create drainage instead of a basin for rainwater. A cover naturally pulls toward the highest points of an object, so unsupported gaps can become low areas where water collects. Simple supports can improve the final shape without placing excessive tension on the cargo.
Measure the Covering Path, Not Just the Main Body
Record length, width, and height, then account for the widest path created by protrusions. A side-mounted cabinet, exhaust stack, or projecting frame may determine the required film size more than the central body. Measure around the full covering path rather than relying only on the equipment’s nominal dimensions.
Decide whether the project needs top-and-side protection with an open base or complete encapsulation. Partial coverage may be suitable when the object sits on a protected platform and only the top and sides require shielding. Full encapsulation may be preferable for demanding transport, long-term storage, or exposure from below. Make this choice before calculating material.
Allow extra film for perimeter attachment, end folds, corner pleats, overlap, and irregular projections. Material folded around strapping or attachment strips requires additional length below the anchor line. Corners also need enough film to form controlled pleats without pulling adjacent areas out of position.
Set Up the Work Area and Tools
Prepare the heat tool, fuel supply, regulator, hose, strapping, tensioning equipment, padding, fastening materials, tape, protective gloves, and a suitable fire extinguisher. Inspect the hose and connections before use, keep combustible materials away from the heating area, and make sure the operator has a clear escape path.
Postpone the job when strong wind, combustible materials, damaged equipment, or poor access prevents controlled handling and heating. Large loose sheets can catch wind suddenly, while restricted movement makes it harder to maintain a safe heating distance. The installation should begin only when the crew can control both the film and the heat source.
Secure the Film and Shrink It in a Controlled Sequence
Drape the Film Without Contaminating or Damaging It
Move the film over the object without dragging it across the ground. Center the sheet so both ends and sides retain enough material for folding and perimeter attachment. Keep unused portions folded as long as possible because a fully opened wide sheet catches air and becomes harder to position.
Shape excess film rather than cutting it away immediately. Form controlled pleats at corners and changes in geometry instead of leaving random bunches. Neat folds place surplus material in predictable areas, reduce loose pockets, and make welding easier.
Build a Strong Perimeter and Close the Seams
The perimeter carries the inward force created as the film contracts. If one section is weak, the edge may lift or tear before the cover becomes tight. A continuous attachment line matters more than making the loose film look perfectly smooth. Check every planned anchor before heating begins.
Common attachment methods include:
●Folding the film around tensioned strapping and fusing it back onto itself.
●Securing the edge with suitable strips or mechanical fastening points.
●Joining separate sheets through planned overlaps and heat-welded seams.
Choose one starting side and work progressively around the object. Remove broad slack without pulling the unshrunk film drum-tight, then shape corners and close the overlaps. Excessive pre-tension can draw the sheet away from the opposite side or leave too little material for pleats and attachment.
Tape can position folds, reinforce finished seams, and patch small holes, but it cannot replace a sound perimeter. Where several sheets meet, keep overlap widths consistent and place seams where the operator can heat and press them safely. Avoid complicated intersections directly over sharp corners, moving components, or areas that require later access.
Shrink from the Base Upward
Begin with a short test pass on a low, inconspicuous area. The film’s response will show whether the operator needs to adjust distance, speed, or sweep width. Different film structures and ambient conditions can affect how quickly the surface tightens.
Start near the secured base so the attachment line stabilizes before upper sections contract. Move upward only after the lower film begins tightening evenly. This sequence helps prevent the upper material from pulling loose film away from an unfinished perimeter.
Use smooth, overlapping sweeps while keeping the heat source moving. Avoid directing heat continuously at one spot, even if the film has not fully tightened. A light first pass is safer than trying to finish one patch in a single exposure because loose areas can be revisited after neighboring film starts to contract.
Alternate vertical and horizontal movement across broad surfaces to balance tension. Work in manageable sections, paying attention to how each heated area affects the film beside it. Leave the large top section until later so it does not pull material away from unfinished sides.
Slow Down Around Corners and Sensitive Areas
Corners, pleats, and overlaps contain extra layers and react differently from open spans. Reduce heat exposure around welded seams, sharp edges, painted panels, plastic fittings, seals, windows, cables, and electrical enclosures. Use repeated controlled passes rather than forcing these areas tight at once.
Heat-softened overlapping film can be pressed together with an appropriate protective glove or tool to create a welded seam. Work gradually along the overlap rather than trying to seal a long section in one movement. Check that the layers have bonded without burning through the outer surface.
Stop if the film develops dark glossy patches, holes, smoke, scorching, or pulls away from an anchor. Let the area cool, inspect the attachment, and repair or reposition the material before continuing. Some fragile fittings also need intentional clearance rather than maximum contraction. The goal is a stable enclosure, not a film surface forced flat against every contour.
Finish the Cover for Its Actual Storage or Shipping Conditions
Inspect the Cover After It Cools
Allow the film to cool before judging final tension. Walk around the object and check every seam, overlap, pleated corner, anchor, and contact point near protrusions. Look for punctures, thin darkened areas, loose panels, or low sections that could hold water.
Repair minor holes with compatible heat-shrink tape and reinforce high-stress contact areas. Tape should extend beyond the damaged zone onto clean, sound film. If a puncture sits directly over a sharp component, add padding before completing the repair so the problem does not return.
Rebuild large tears, unstable seams, or failed attachment points instead of hiding them beneath repeated tape layers. A final inspection should verify both enclosure tightness and cargo condition. Continue observing the work area after heating has stopped to ensure no hot spots or damaged materials remain.
Add Access, Ventilation, and Cargo-Specific Protection
Install access doors or hatch panels where operators need controls, lifting points, inspection ports, or service areas. Place them on relatively flat, low-stress sections whenever possible. Seal their edges carefully so the opening does not become a starting point for tearing.
Plan ventilation when trapped moisture or condensation may affect the product. The appropriate number and position of vents depend on the enclosure size, climate, storage duration, and moisture already present inside. Ventilation should reduce condensation without creating openings that allow direct rain entry.
Cargo type determines the final priorities. For modular units, inspect long seams, roof drainage, corners, windows, doors, and surfaces exposed to highway airflow. For machinery, focus on painted housings, ports, control boxes, lifting points, and irregular projections. These details influence fit, reinforcement, access, and long-term protective performance.
Conclusion
A durable result depends less on using more film or heat than on making the right decisions before installation. Accurate measurements, padded contact points, a secure perimeter, steady base-to-top heating, and a careful final inspection allow crews to shrink wrap large objects with fewer weak seams, punctures, and loose areas.
Suzhou Ecopack Co.,Ltd. supplies heat shrink wrap, custom-fit shrink covers, and shrink accessories for machinery, modular units, and other oversized cargo. These options can reduce on-site cutting, support a more consistent fit, and help packaging teams prepare large items more efficiently for storage, transport, or outdoor exposure.
FAQ
Q: How do you shrink wrap large objects safely?
A: Inspect and pad sharp areas, drape the film, secure a continuous perimeter, form controlled pleats, then apply heat in moving sweeps from the base upward.
Q: What thickness of shrink wrap is suitable for large items?
A: Film thickness depends on object size, sharp edges, transport conditions, and exposure time. Heavy machinery and outdoor loads generally need thicker or reinforced material than sheltered items.
Q: How should a large object be measured for shrink wrapping?
A: Measure its length, width, height, and widest path around all protrusions. Add sufficient material for perimeter fastening, end folds, corner pleats, and overlapping seams.
Q: Can a regular heat gun shrink wrap oversized equipment?
A: A purpose-built propane shrink-wrap heat tool is typically used for oversized projects. Household heat guns may be too slow, while uncontrolled flames can damage the film and cargo.
Q: How can holes be prevented while applying heat?
A: Pad sharp corners, keep the film clean, avoid excessive pre-tension, and keep the heat tool moving. Dark glossy spots, thinning, or smoke indicate excessive localized heat.
Q: Is shrink wrap the same as stretch wrap?
A: No. Shrink wrap contracts under controlled heat to form a fitted cover, while stretch wrap relies on tension and is wound around a load without heating.