
Views: 0 Author: Site Editor Publish Time: 2026-07-22 Origin: Site


A package can look secure and still fail in storage or transit if the film is oversized, the seams are weak, or heat is applied unevenly. Wrinkles, trapped air, punctures, and scorched film often begin with poor preparation rather than the material itself.
Learning how to use heat shrink wrap means controlling film selection, product preparation, sealing, and heat movement. The right method creates a close, stable cover without crushing delicate components or wasting material. Readers will learn how to choose suitable film and tools, apply heat safely, adapt the process to different loads, and correct common wrapping defects.
Start with the product’s shape and packaging volume. Shrink bags suit repeatable items with similar dimensions, tubing works for long products, and centerfold film handles many retail or boxed goods. Flat rolls provide flexibility when sizes vary, while custom-fitted covers reduce excess material around machinery, modular units, boats, vehicles, and other oversized cargo. Clear film supports product visibility, whereas opaque material can conceal equipment and reduce light exposure.
Film construction should reflect the exposure risk. Standard film covers general packaging, reinforced material resists rough handling, UV-stabilized film supports outdoor storage, and VCI film can help protect metal equipment from corrosion. ECOPACK options include standard, reinforced, VCI, flame-retardant, biodegradable, and custom-fit materials with configurable dimensions and thicknesses.
Measure length, width, height, circumference, the widest point, and major protrusions. Add enough material for loading, folding, and sealing, but avoid excessive film that creates bulky corners and uneven shrinking.
For example, a machine measuring 48 by 30 by 36 inches needs a cover that clears the length and depth while leaving workable material at the base and seam. These measurements also determine the required sealer width and whether the wrapped unit can enter a heat tunnel. Accurate sizing therefore controls both material use and equipment compatibility.
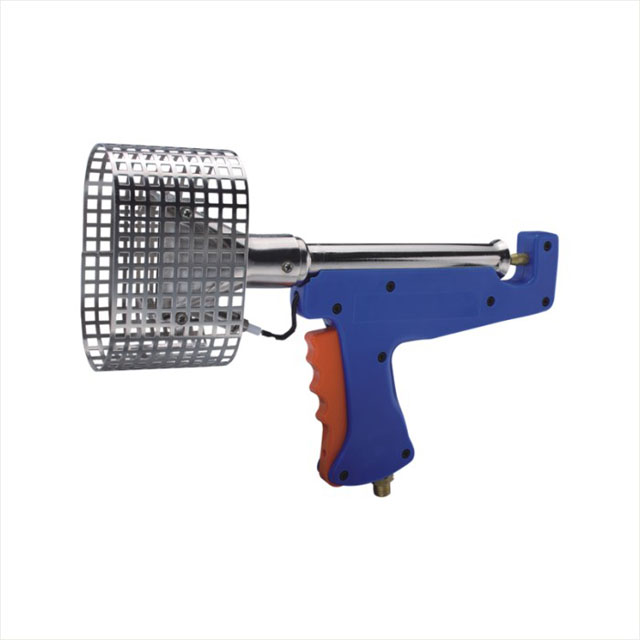
A heat gun suits small batches, repairs, irregular shapes, and field work. A heat tunnel offers more consistent temperature and dwell time when products are standardized and volume is high. Select shrink accessories only when they solve a defined installation need:
● Use a sharp cutter, compatible sealer, and heat-resistant gloves.
● Use shrink tape for seams, overlaps, or small repairs.
● Use clips, access doors, or vents for fastening, inspection, or airflow.
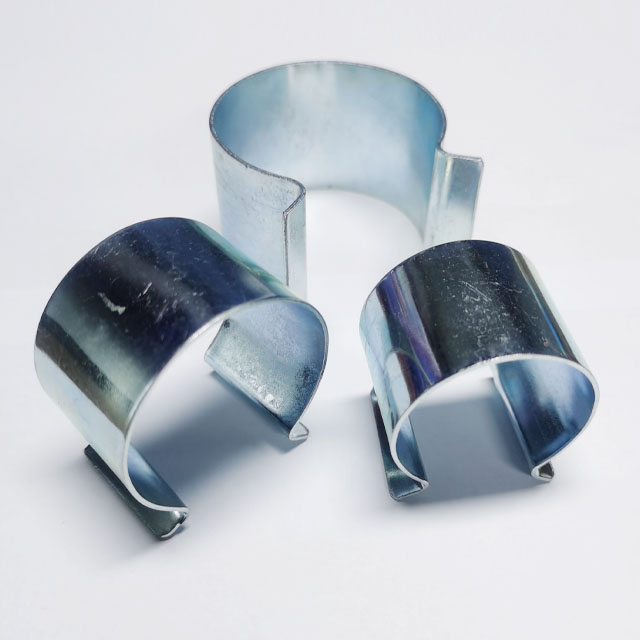
Useful shrink accessories include heat shrink tape, pipe clips, hatch doors, reusable access doors, heat guns, and related tools for industrial, marine, storage, and outdoor projects.
Any dirt, oil, or moisture left on the product becomes trapped after the film tightens. Clean the surface, let it dry fully, and remove loose debris that could scratch finishes or interfere with seals. Secure movable parts so they cannot shift while the film contracts.
Pressure-sensitive areas need protection before wrapping. Place suitable padding around glass, screens, polished panels, and painted surfaces, then cover sharp corners, bolts, blades, or projecting brackets with edge guards or cushioning. The film develops tension as it shrinks, so a point that feels harmless before heating can become a puncture source once the cover tightens. Cleaning the item, protecting fragile areas, and checking the dimensions before cutting the film help prevent avoidable failures.
Identify components that could deform, discolor, or fail under heat, including soft plastics, adhesives, displays, seals, and coated surfaces. Those areas may require greater gun distance, faster passes, shielding, or a lower-temperature film system. Decide where expanding air will escape before closing the package; otherwise, the film may balloon and trap pockets as the ends tighten.
Long-term enclosures also need a moisture plan. Vents can encourage airflow, while an access door allows inspection or servicing without removing the entire cover. Keep lifting points, labels, controls, and service panels accessible. Work in a ventilated area, clear flammable materials from the heating zone, and follow the operating instructions for the selected film and heating equipment.
Place the item in the bag, tubing, cover, or film sheet so excess material is distributed evenly. A product pushed to one side creates one tight face and another filled with folds. Centering also makes it easier to position seams and control airflow during shrinking.
Cut the film with a sharp tool to produce a straight edge. Leave enough material for a complete seal, but remove long flaps that would bunch at corners. On an irregular load, fold broad areas of excess film flat before heating to reduce loose “ears” and create a cleaner profile.
Seal open ends with equipment or fastening methods compatible with the film. The sealing surface should be clean, flat, and free from deep folds because wrinkles can form channels through an otherwise closed seam. When one sheet cannot cover the full item, overlap sections and reinforce the joint with compatible tape or a controlled heat weld.
Air management belongs in the sealing plan. Leave a planned escape path or create a small vent point where appropriate, especially on broad, box-like packages. If both ends close before the middle contracts, air can remain trapped beneath the film and produce bubbles or uneven tension.
The most reliable way to learn how to use heat shrink wrap is to treat heating as a sequence rather than a race. Start with the recommended temperature range, hold the heat source at a safe working distance, and keep it moving. A setting used for one film thickness or product may not suit another.
Use this sequence as a practical step-by-step guide to using heat shrink wrap for packaging and protection:
1. Anchor a stable central area with controlled passes.
2. Move from the center toward an open edge so air can escape.
3. Work around the product instead of finishing one face at once.
4. Overlap each pass to avoid cold strips.
5. Reduce heat near corners, thin film, paint, and sensitive parts.
6. Stop when the film is smooth, then let it cool before handling.
Correctly heated film conforms without discoloration, thinning, or brittle patches. Seams should remain flat, and the covering should feel stable rather than excessively tight around delicate components. Keep the heat source moving, work from the middle outward, allow the film to cool, and check for wrinkles or trapped air.
Cooling allows the film to set into its new shape. Moving the package too early can distort warm material or stress a fresh seal. With a tunnel, verify airflow, conveyor speed, and dwell time on a test package before increasing output. Uniform equipment settings still need to match the selected film and product mass. Once cool, inspect the base, corners, overlaps, and areas behind protrusions.
Regular cartons, books, boxed components, and other consistent products benefit from a repeatable setup. Standardize film size, seal position, heat setting, working distance, and heating time instead of relying on operator judgment for every unit. Run one test package, let it cool, and inspect it before processing the batch.
Handle the sample as the shipped product will be handled. Check corner coverage, label visibility, seal strength, and fit after stacking or short-term storage. Record the successful settings as a baseline for later runs.
Manual heating remains useful when quantities are low or shapes vary. As volume rises, a tunnel or semi-automated system can improve consistency through controlled temperature, airflow, and conveyor speed. Automation, however, cannot compensate for incorrect sizing or weak seals.
Large loads require more planning because lifting points, sharp geometry, long seams, and outdoor exposure create additional stress. Pad contact points, reinforce rubbing areas, and fold excess material against bases and corners. Multiple film sections may be used, but overlaps must remain secure during handling and shed water where exposure is expected. Keep seams away from forklift contact zones and other points where routine movement could abrade the joint.
Vents and access doors are useful when equipment stays wrapped for long periods or needs periodic inspection. Custom-fit and reinforced ECOPACK solutions can be used for machinery export, modular construction, outdoor storage, marine applications, vehicles, pallets, and other large cargo.
Industrial equipment & machinery covers can reduce uncontrolled folds and give installers a consistent starting point. They do not remove the need for edge protection, ventilation planning, sound seams, and careful heating.
A defect usually reveals which stage failed. Diagnose the appearance before adding more heat, because reheating the wrong area can turn a minor issue into permanent damage.
Visible defect | Likely cause | Corrective action | Rewrap? |
Loose film | Oversized film, low heat, or unsuitable shrink range | Reheat if shrink capacity remains | If fully recovered but still loose |
Wrinkles or air pockets | Poor positioning, uneven passes, or trapped air | Warm lightly and guide air outward | If folds are sealed in place |
Holes or discoloration | Excess heat, close distance, or stationary heating | Stop and assess film strength | Usually for burn-through |
Split seam | Dirty, folded, weak, or overstressed seal | Reseal or reinforce sound film | If the primary seal is unreliable |
Repeated punctures | Unprotected edges or weak film | Add padding and stronger film | Yes |
One loose section may need controlled reheating, while widespread looseness usually signals incorrect sizing. Burned or brittle film has lost protective value.
Reheat only where the film remains intact and has enough shrink capacity. Protect adjacent areas that are already smooth, and use brief moving passes. Small punctures or limited seam damage may be patched with compatible shrink tape when the surrounding film is sound.
Start again when the film has extensive burn-through, multiple tears, distorted seams, or a size mismatch. Rewrapping is also necessary when a defect compromises moisture protection, load stability, or presentation. Wrinkles, air pockets, poor fit, overheating, and incorrect sizing should be corrected before the package enters storage or transportation.
Before release, check seam closure, corner coverage, tension, vents, labels, lifting access, and package stability. The wrap should follow the product without crushing cartons, bending panels, or loading fragile projections.
Effective shrink packaging depends on choosing the right film, preparing the load carefully, sealing openings securely, and applying heat in steady, overlapping passes. Once operators understand how to use heat shrink wrap, they can reduce loose film, damaged seams, trapped air, and unnecessary material waste.
Suzhou Ecopack Co.,Ltd. offers heat shrink wrap, reinforced films, custom-fit covers, and related packaging options for products ranging from standard loads to industrial equipment. These solutions can help businesses improve fit, protection, and packaging consistency during storage, handling, and transportation.
A: Measure the item, cut the film with sealing allowance, enclose and seal all openings, then apply moving heat from the center outward. Let the film cool before handling.
A: The correct temperature depends on the film type, thickness, and equipment. Begin with the recommended range, test a small section, and increase heat gradually to prevent damage.
A: Some thin household shrink bags may react to a powerful hair dryer, but most packaging films require a heat gun or tunnel for consistent and controlled shrinking.
A: Open-ended bags and tubing generally require a heat sealer. Some large covers can be fastened or taped, but secure seams remain essential for stable, protective packaging.
A: Center the product, smooth large folds, leave a controlled air escape path, and apply heat in overlapping passes. Wrinkles usually result from poor sizing or uneven heating.
A: Properly selected and fully sealed film can resist rain, dust, and moisture. Protection may be reduced when seams, vents, punctures, or uncovered areas remain exposed.


